Want to Become a Real Estate Photographer? Here’s Exactly How to Start (Without Fancy Gear or Big Clients)

Disclaimer: The information in this article is provided for general educational and informational purposes only. Starting a career in real estate photography involves creative, legal, and business considerations that may vary depending on your location and circumstances. While we share practical tips and personal insights, this content should not be considered professional business, legal, or financial advice. Always do your own research and consider consulting with industry professionals before making business decisions or investments.
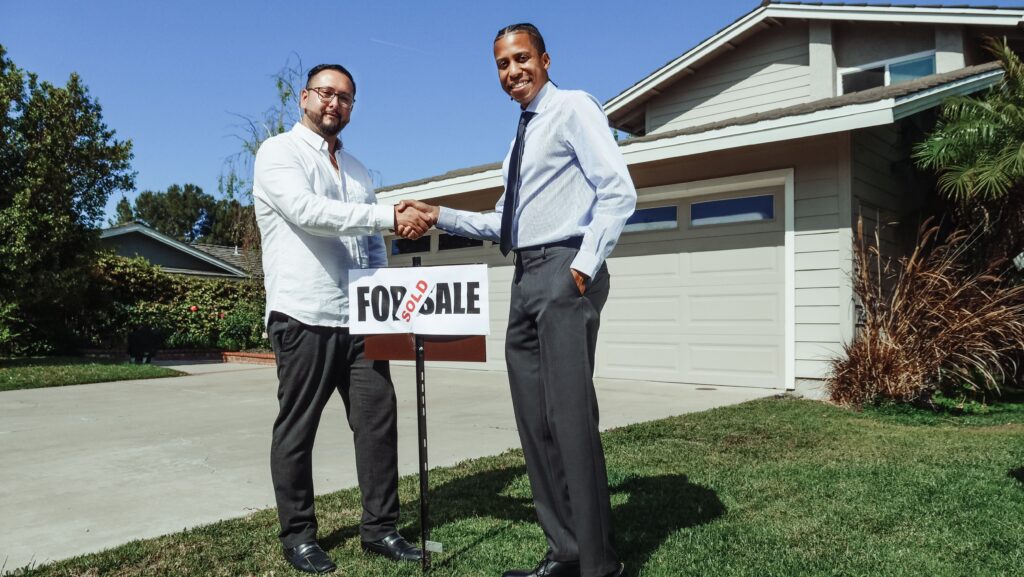
Are you thinking about jumping into real estate photography? You’re not the only one.
More people are picking up a camera and turning it into a legit career path as demand from agents, brokerages, and marketing teams continues to grow.
If you’ve got an eye for composition and know how to capture a space at its best, real estate photography is a viable, in-demand skill. It’s creative work with commercial value, and the industry’s showing no signs of slowing down.
In 2024, there were already over 6,100 professionals and nearly 7,000 businesses working in real estate photography across the U.S. And the numbers keep rising.
If you’re serious about becoming a real estate photographer, the experts from our real estate recruitment agency will walk you through every key step: what the work involves, what gear is worth buying, how to build a client-ready portfolio, and how to start getting paid.
No fluff. Just the practical know-how that gets working photographers noticed and hired.
Let’s begin, shall we?
What Is Real Estate Photography?
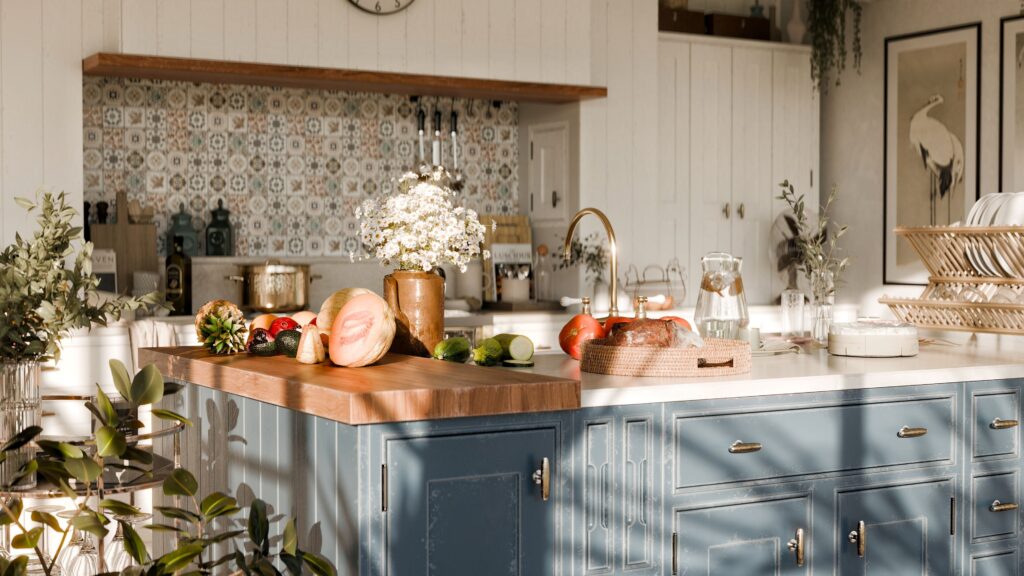
Simply put, real estate photography is about making properties look their best without overselling them.
These are the photos people see first when scrolling through listings or checking out flyers. In most cases, the photos decide whether someone books a showing or keeps scrolling.
The job is simple on paper: take high-quality images that highlight the space, its layout, and its best features.
But doing it right takes more than just decent gear. You need to understand how to show off a space in a way that feels clean, honest, and visually sharp.
Why Real Estate Photography Matters (Backed by Data)
Here’s why this kind of photography has become such a key part of the real estate world.
Buyers make decisions fast, and visuals are what pull them in. Good photos don’t just make a listing look better. They influence clicks, drive showings, and even speed up the sale.
The numbers speak for themselves:
- As noted by the National Association of REALTORS®, 85% of buyers say photos are the top factor when deciding which homes to view. Over 90% start their search online, so visuals often make the first impression.
- Homes listed with professional photos sell 32% faster than those without.
- 60% of agents say professional photography gives them the best return on investment when it comes to marketing, per World Metrics.
- More than 70% of agents say quality images help them build their brand. For agents trying to stand out in crowded markets, strong visuals are part of the strategy.
These numbers show what real estate professionals already know: good photography moves listings, builds trust, and helps close deals faster.
7 Main Types of Real Estate Photography
| Type | Description | Common Clients |
| Residential | Covers homes, condos, and apartments. Highlights spaces to appeal to potential buyers or renters. | Real estate agents, homeowners, renters |
| Commercial | Focuses on business properties like offices, retail stores, and warehouses. Used for selling or leasing commercial spaces. | Agents, property managers, investors |
| Architectural | Emphasizes the design and structure of buildings. Captures a polished, stylized look to showcase architecture. | Architects, builders, developers |
| Interior | Zooms in on furniture, lighting, textures, and styling. Highlights the ambiance and design of interiors. | Interior designers, stagers, magazines |
| Drone Photography | Aerial shots of properties and surroundings. Great for showing land size, location, and overall layout. | Agents, developers, luxury property marketers |
| Twilight Shots | Taken at dusk to capture warm lighting and mood. Adds a dramatic, high-end feel to property listings. | High-end agents, luxury listings |
| Virtual Tours | Interactive 3D walkthroughs of properties. Allows potential buyers to explore the space remotely. | Agents, property managers, remote buyers |
Which type should you choose? Start by thinking about what excites you most:
- If you enjoy fast-paced shoots and variety, residential is a great entry point.
- Love clean lines and design? Architectural or interior photography might be your niche.
- If you’re into tech and aerial views, drone photography can set you apart.
- Prefer high-end, dramatic visuals? Twilight shots could be your specialty.
- And if you’re into tech and storytelling, virtual tours offer an immersive, in-demand skillset.
Try a few styles, see what clicks, and build your portfolio around what you enjoy and where demand is strong in your area.
Real Ways to Learn Real Estate Photography (No Degree Required)
First off, you don’t need a degree or a fancy certificate to become a real estate photographer.
Most people in the field got their start through hands-on learning, online resources, and plenty of trial and error. The important part is building skills, not having a diploma on the wall.
According to the U.S. Bureau of Labor Statistics, the typical entry-level education for photographers is just a high school diploma or equivalent.
That applies in the real estate market, too. Agents and clients care about results, not credentials.
Recommended learning platforms
There are plenty of solid platforms out there where you can pick up the skills. Here are a few that real estate photographers consistently find useful:
1. Udemy
Udemy is a solid choice for building your foundation or sharpening specific techniques. It’s affordable, self-paced, and packed with real estate photography content.
Top-rated courses include:
- Real Estate Photography: How To Get Started. A beginner-friendly course that touches on camera settings, editing, gear, prep work, and client delivery.
- Mastering Architecture and Real Estate Photography. Covers everything from HDR to lighting and post-processing, taught by award-winning photographer Charlie Borland.
- Real Estate Photography Masterclass. Includes gear breakdowns, composition techniques, 30 case studies, and a Photoshop tutorial.
- Drone Photography for Real Estate. Focuses on aerial equipment, framing, and how to build a profitable drone business.
Each course includes a certificate and lifetime access.
2. Skillshare
Skillshare is great if you prefer project-based learning. It’s a subscription model, so you get access to all classes for a flat monthly fee.
Some standout options include:
- Real Estate Photo Editing: Like a PRO in Lightroom. This course walks you through an efficient Lightroom workflow to polish your real estate shots with pro-level quality.
- How to Shoot Professional Real Estate Videos. Covers gear selection and video shooting techniques.
3. Other platforms
If you’re looking for more niche or advanced resources, these are worth checking out:
- The Academy of Real Estate Photography. Offers a certification program covering techniques and marketing strategies.
- Cambridge Open Academy’s Real Estate Photography Masterclass. Focuses on composition, lighting, editing, and virtual staging.
- PRO EDU’s Real Estate Photography Classes. Offers in-depth content across all skill levels, with extra focus on business strategy.
6 Key Skills and Knowledge to Become a Real Estate Photographer
Once you’ve got a handle on the basics and explored a few solid learning platforms, it’s time to sharpen the skills that actually get you hired.
You’ll need a mix of creativity, technical know-how, and some business sense too.
A few of these are must-haves from day one; others you’ll pick up as your work (and client list) grows:
❗️ Most Essential: Photography Fundamentals
This is your foundation. Learn how to use your camera confidently (adjusting aperture, shutter speed, ISO) and pay attention to natural light, angles, and composition.
Your job is to make rooms look clean, bright, and inviting, without exaggerating or distorting the space.
✅ Important: Post-Processing Skills
Editing helps bring out the best in your photos. You’ll want to get comfortable with tools like Lightroom, Photoshop, or other editing apps.
At a basic level, this means correcting brightness, contrast, color, and perspective. As you improve, you’ll likely develop a consistent editing style that becomes part of your brand.
✅ Important: Videography Basics
Video tours and short-form clips are in high demand, especially for social media or higher-end listings.
You don’t need a full production setup, but being able to shoot clean, steady walkthroughs using a gimbal or even a phone can add serious value to your services.
✅ Important: Experience with AI Tools
AI can speed up a lot of the behind-the-scenes work. Tools now exist for auto-editing, sky replacements, image upscaling, background cleanup, and even selecting your best shots from a batch.
Top AI tools for real estate photographers include:
- Luminar Neo: AI photo editor with tools like sky replacement, relighting, and object removal.
- Adobe Photoshop (with Generative Fill): For AI-based object removal, background expansion, and sky replacement.
- Topaz Labs (Gigapixel AI, DeNoise AI, Sharpen AI): For image upscaling, noise reduction, and sharpening.
- Remove.bg / Cleanup.pictures: Quick background cleanup and object removal with AI.
- Photomatix: AI-assisted HDR image processing.
- Autoenhance.ai: Designed specifically for real estate photography, it offers sky replacement, perspective correction, and color balance.
- NVIDIA Canvas: Use AI to sketch and generate photorealistic environments (helpful for staging concepts).
- Imagen AI: Learns your editing style and batch-edits Lightroom photos accordingly.
- Aftershoot: Automatically selects the best photos from a shoot based on sharpness, emotion, and composition.
- Runway ML: Powerful generative AI for creative edits and background replacement with video support.
- SkyAI in Aurora HDR or Luminar: For automated, realistic sky replacements in property shots.
- ChatGPT or Jasper: For writing compelling real estate listing descriptions based on your images.
Knowing how to use these efficiently helps you deliver results faster and keeps your workflow competitive.
Quick Fact: 82% of photographers use AI tools for image enhancement and editing, and 45% of pros rely on AI to speed up their editing workflow. So yes, AI is now part of how the job gets done.
⚠️ Good to Have: Understanding the Market
Knowing what real estate agents and homeowners are looking for helps you plan your shots better. This might mean highlighting natural light, showing how rooms connect, or understanding trends in how listings are presented.
⚠️ Good to Have: Social Media Savvy
Posting your work regularly, sharing helpful tips, or just giving a peek behind the scenes can help grow your visibility and attract new clients.
Even if you’re not aiming to build a huge following, being findable and active online helps you stay top of mind.
Necessary Equipment for Real Estate Photography
You don’t need the most expensive gear to start real estate photography, but having the right tools makes a big difference in how your photos turn out – and how smoothly your shoots go.
Here’s a list of the essentials, along with some popular options that photographers actually use.
– Camera
A DSLR or mirrorless camera with manual settings is ideal. You’ll want something with good dynamic range and resolution.

Popular models include the Canon EOS R6, Sony A7 IV, or Nikon Z6 II. These all perform well in different lighting conditions and give you flexibility in editing later.
– Lens
A wide-angle lens is key for capturing entire rooms without distortion. Something in the 16–35mm range works well.
For Canon users, the Canon RF 15-35mm f/2.8L is a top pick. Sony shooters often go for the Sony FE 16-35mm f/4 G. Sigma and Tamron also make great wide-angle lenses at a more affordable price point.
– Tripod
A sturdy tripod keeps your camera stable for sharp, consistent shots – especially when using slower shutter speeds indoors.
Look for models like the Manfrotto Befree Advanced or Benro TMA38CL, which are lightweight but solid.

A tripod with a built-in level or adjustable head helps get those perfectly straight lines, which matter a lot in real estate photography.
– Flash or Lighting Kit
Natural light is great when you can use it, but for darker spaces or cloudy days, extra lighting helps.
On-camera flashes like the Godox V1 or Canon Speedlite 430EX III-RT are popular choices. Some photographers also bring portable LED panels like the Aputure Amaran or Neewer 660 for more control.
– Drone (Optional but Valuable)
For aerial shots of larger properties or homes with scenic surroundings, a drone can make your work stand out.

The DJI Air 3 or DJI Mini 4 Pro offer great image quality, reliable stability, and are beginner-friendly. Just make sure to check local regulations and licensing requirements before flying.
🧠 Did You Know? In 2025, 65% of real estate agents reported plans to increase their use of drone photography, as noted by World Metrics. If you plan to offer aerial shots, you’re in a good spot.
– Editing Software
Once you’ve taken the photos, you’ll need software to edit them. Adobe Lightroom is the go-to for most photographers, with Photoshop used for more detailed adjustments.
Some also add tools like Photomatix for HDR blending, or Luminar Neo for AI-powered edits.
Start with the basics, and don’t worry about having every piece of gear right away. A solid camera, a wide-angle lens, and a tripod are enough to get going.
As you gain experience, you’ll figure out which tools fit your style and workflow best, and upgrade as you go.
How to Build Your Real Estate Photography Portfolio
If you’re diving into real estate photography, your portfolio is more than just a collection of pretty pictures. It’s your calling card, your proof of skill, and the key to landing clients.
Let’s break down how to build a portfolio that gets attention, builds trust, and opens doors.
1. Start With What You Have
@bts.with.agnes Come with us to shoot an $800k apartment 📸 #sydneyrealestate #sydneyphotographer #sydneyrealestatephotography #btswithagnes #behindthescenes ♬ Walking Around – Instrumental Version – Eldar Kedem
You don’t need access to million-dollar listings to get started. Use what’s around you: your own apartment, your parents’ house, your best friend’s place.
The key is to treat it like a paid job:
🧼 Clean the space thoroughly.
🛋️ Stage it with intention – add plants, fluff the pillows, declutter.
📅 Plan your shoot during the best daylight hours.
Use these opportunities to practice different compositions, experiment with camera settings, and see how small adjustments affect the final shot. This is your sandbox, learn and play!
2. Offer Free or Discounted Shoots
In the beginning, experience is more valuable than income. Your goal right now is to build a strong portfolio and start making connections in the industry.
One of the best ways to do that?
Offer your services for free or at a heavily reduced rate to people who could actually use your work: real estate agents, Airbnb hosts, interior designers, home stagers, or property managers.
This isn’t about working for exposure. Instead, you’ll be getting real-world practice, building confidence, and creating content that actually reflects the kind of work you want to do long-term.
📩 When reaching out, keep your message short, friendly, and professional. Be upfront about why you’re reaching out: you’re building your portfolio and would love the opportunity to provide high-quality images in exchange for permission to use them in your marketing.
Let them know they’ll still get the full professional experience: edited images, fast turnaround, solid communication.
That alone will help you stand out. And if you’re not sure how to say it, here are a few message templates you can borrow (and tweak to fit your voice):
💼 Option 1: Professional-Friendly (Great for agents, stagers, property managers)
Subject: Complimentary Real Estate Photography to Help Showcase Your Listings
Hi [Agent’s Name],
My name is [Your Name], and I’m a real estate photographer based in [Your City]. I’m currently building my portfolio and looking to collaborate with a few local agents who want high-quality images to help their listings stand out.
I’d love to offer you a free (or discounted) photo shoot for an upcoming listing – no strings attached. You’ll receive professionally edited, MLS-ready images, and in return, I’d just like permission to use the photos in my portfolio and marketing materials.
If you have a listing coming up that could use sharp, well-lit photos, I’d be happy to chat further or get it scheduled. Let me know what works best for you!
Best regards,
[Your Name]
[Your Website or Instagram]
[Your Phone or Email]
😎 Option 2: Casual-Confident (Great for DMs or friend-of-a-friend intros)
Hey [Name]!
I’m a real estate photographer here in [Your City] and I’m building out my portfolio right now. I’d love to offer you a free (or super discounted) shoot for one of your listings – just to show what I can do and help you make the property really pop online.
You’d get fully edited photos, ready for MLS or Airbnb, and I’d just ask to use a few of the shots in my portfolio and social media.
Got anything coming up that needs some fresh visuals? Let me know, I’d love to work together!
– [Your Name]
📸 [Your Instagram or Website]
🛏️ For Airbnb Hosts (Email, DM, or even a message through the Airbnb app)
Subject: Free Photos for Your Airbnb Listing
Hi [Host’s Name],
I’m a real estate photographer based in [Your City], and I’m currently building my portfolio with a focus on short-term rentals like yours. Your Airbnb listing caught my eye, and I’d love to offer you a free professional photo shoot to help showcase the space in its best light.
You’ll get a full set of high-quality, edited images that can help increase bookings and make your listing stand out. In return, I’d simply like to include the photos in my portfolio and social media.
Let me know if you’re interested or if you have any questions, I’d love to work together!
Best,
[Your Name]
[Website or Instagram]
[Phone or Email]
🛋️ For Interior Designers (Email or Instagram DM)
Subject: Free Photography to Showcase Your Designs
Hi [Designer’s Name],
My name is [Your Name], and I’m a real estate and interior photographer based in [Your City]. I’m currently expanding my portfolio, and I’d love to collaborate with a local designer to help capture their work in a polished, professional way.
If you have a recent project you’d like photographed, I’d be happy to offer you a complimentary shoot. You’d receive high-resolution, edited images you can use for your website, socials, or portfolio – and I’d include a few in mine as well.
Let me know if that sounds like a good fit. I’d love to bring your spaces to life through photography!
Warmly,
[Your Name]
[Instagram or Website]
[Phone or Email]
You can send messages like these via email, Instagram DMs, or even comment on a social post if they’re active online.
Just make sure to personalize it: mention something specific about their listing, design style, or location to show you’re reaching out with intention, not just spamming.
This outreach strategy not only helps fill your portfolio with real-world projects, but it also builds your local network.
And when people see how professional you are (even when working for free), they’re way more likely to recommend or hire you when the budget is real.
3. Showcase a Variety of Work
You want to look versatile and capable. Even if you’re shooting similar types of homes at first, capture a variety of scenes and styles:
- 🛋️ Wide-angle interior shots (living rooms, kitchens, bedrooms)
- 🚪 Close-up detail shots (doorknobs, lighting, textures)
- 🌿 Exterior shots (daylight, dusk, maybe even some light landscaping)
- 🪟 Windows and natural light (how the light moves through the space)
- 📐 Architectural angles and lines
This gives potential clients the confidence that you can handle their listing, no matter the size or style.
4. Focus on Quality Over Quantity
A huge portfolio doesn’t mean a good portfolio. Curate your best 10–15 images; ones that show skill, vision, and consistency.
Every shot should feel purposeful. Is it well-composed? Is the lighting flattering? Are the colors natural and true to life?
🚫 Avoid repetitive angles, dark corners, or heavily edited images that look unnatural.
A small, powerful portfolio will always leave a better impression than a bloated one full of “filler” shots.
5. Edit Like a Pro
Even great photos can be ruined by poor editing. Get comfortable using Lightroom or Photoshop to take your images from “pretty good” to “scroll-stopping.”
🎛️ Straighten your vertical lines (especially important for interiors!)
💡 Adjust exposure so rooms look bright but still realistic
🎨 Maintain natural colors – no over-saturation or crazy filters
👀 Zoom in and check for blemishes, clutter, or distracting elements you missed during the shoot
Your editing style becomes part of your visual brand: aim for clean, polished, and consistent across all your shots.
6. Build a Simple Portfolio Site

Now it’s time to show off your work professionally. Don’t just post everything on Instagram and call it a day; instead, create a clean, dedicated portfolio website.
💻 Use platforms like Squarespace, Wix, or Pixieset. They’re beginner-friendly and designed for creatives.
📱 Make sure it’s mobile-friendly (a lot of clients will view it on their phone).
📝 Include an About page, your contact info, and possibly your pricing or packages if you’re ready.
Remember: your website should feel like a visual extension of your work; simple, elegant, and easy to navigate.
7. Keep It Fresh
Your portfolio isn’t a “set it and forget it” situation. As your skills grow, so should your gallery.
✅ Replace older work with better, more current examples
🎯 Try new styles or experiment with different lighting techniques to stay fresh
📊 Look at what’s getting the best feedback from clients or followers, and lean into that
Don’t be afraid to evolve. Your portfolio is a living, growing part of your brand.
8. Build Your Presence on Instagram & TikTok
Social media isn’t optional anymore; now, it’s a visibility machine for photographers. Your future clients (especially agents and stagers) are already scrolling. Show up in their feed.
On Instagram:
- Share your final shots, behind-the-scenes clips, and editing tips
- Use location-specific and niche hashtags (#DallasHomes #RealEstatePhotography)

- Tag clients, agents, and stagers; it increases reach and builds community
- Use Stories to share quick updates or walkthroughs
On TikTok:
- Film short, engaging clips like “Before & After” edits, time-lapse room setups, or “a day in the life” content
- Educate and entertain: quick tips like “how I get straight lines” or “why I shoot at golden hour” go a long way
- Add trending music or voiceovers to increase visibility
- Be real! Raw, authentic content often outperforms polished videos
The goal? Be visible. Build trust. Show that you’re not just talented; you’re professional, creative, and bookable.
BONUS: Show Behind-the-Scenes
People love a peek behind the curtain. Show them how the magic happens.
📸 Snap a few photos of your camera setup, lighting equipment, or staging process
🎥 Post a time-lapse of a full shoot from setup to final shot
🧰 Share your gear list (people are always curious!)
This helps demystify what you do and builds trust with clients who want to see that you’re detail-oriented and professional.
To sum up, you don’t need the fanciest gear or the most luxurious listings to get started. What you do need is:
✔️ A good eye
✔️ A willingness to learn
✔️ A commitment to quality
✔️ And a smart plan to get your work seen
Build your portfolio like you’re building your business: step by step, with intention. And remember: every shoot is a chance to improve your craft and grow your reputation.
Setting Pricing and Services
Having a clear real estate photography pricing is how you show clients the value of your work and avoid awkward back-and-forth later. A well-structured offer sets the tone from the start.
How Much Do Real Estate Photographers Make?
Before you start charging for your work, it’s good to know what the market looks like.
According to Indeed, real estate photographers in the U.S. earn around $86,000 a year on average. The full range? Anywhere from $30,599 to $241,777, depending on your experience, the services you offer, and where you’re based.
If you’re going solo and running your own business, those numbers can swing even higher. Especially if you carve out a niche, work fast, or offer high-value packages like drone shots or video walkthroughs.
Setting Up Your Services and Pricing Structure
When it comes to pricing your services, think beyond “just photos.”
What are you really offering? A polished listing that sells faster? A branded experience for agents? More time back for your clients?
So, start by listing out the shoot types you want to offer: standard listings, luxury homes, twilight sessions, aerial shots, 3D tours, or video walkthroughs. Then price each one based on how long it takes, how much gear it requires, and what kind of value it brings to the table.
Make your packages super clear: how many photos are included, how fast you deliver, and whether extras like sky replacements or object removal are part of the deal. You can even offer tiered pricing or à la carte add-ons for clients who want more flexibility.
Whatever you charge, just make sure your pricing reflects your time, your skills, and the quality you deliver. Especially if you’re using AI tools to move faster or elevate your edits. Good work deserves good pay.
📦 Sample Pricing Packages
| Package | Price (Starting at) | Includes |
| Basic Photo Package | $150 | Up to 20 edited images, interior/exterior, 48-hour turnaround |
| Standard Package | $250 | 30–35 edited images, basic AI enhancements (sky replacement, lighting fix), 24–48 hour delivery |
| Premium Package | $400 | 40+ images, drone shots, twilight photography, AI edits, next-day delivery |
| Luxury Showcase | $650+ | All features in Premium + video walkthrough (1–2 mins), virtual staging, branded slideshow |
| Add-Ons | Varies | Drone Photos: +$75; Virtual Staging: +$30/image; Floor Plan Rendering: +$60; Next-Day Delivery: +$50 |
Average Real Estate Photography Pricing in the U.S.
Real estate photography pricing in the U.S. varies based on factors such as property size, location, photographer experience, and additional services offered. Here’s a breakdown of average costs:
Standard Photography Packages:
- Basic Package: $200 – $400
- Includes 10–20 edited photos.
- Suitable for small properties or apartments.
- Mid-Range Package: $300 – $600
- Offers 20–40 edited photos.
- Ideal for standard single-family homes.
- Premium Package: $500 – $1,200
- Provides 40–60 edited photos.
- May include twilight or night shots.
- Best suited for larger or luxury homes.
Aerial (Drone) Photography:
- Basic Drone Package: $150 – $300
- Includes 5–10 aerial shots.
- Highlights property and surroundings.
- Comprehensive Drone Package: $400 – $800
- Offers 10–20 aerial shots.
- May include video footage.
Videography Services:
- Basic Video Tour: $200 – $500
- 1–2 minute video with basic editing and background music.
- Full Video Tour: $500 – $1,500
- 3–5 minute video with professional editing, music, and voiceover.
3D Tours and Virtual Staging:
- 3D Virtual Tour: $200 – $500
- Interactive walkthrough using platforms like Matterport.
- Virtual Staging: $50 – $200 per room
- Digitally furnishes empty rooms to enhance appeal.
Regional Pricing Variations:
Photography costs can differ significantly by city. For instance:
- Los Angeles: Average of $318 per session.
- New York: Approximately $285 per session.
- Miami: Around $256 per session.
These figures highlight the importance of considering local market rates when setting pricing.
Factors That Can Influence Your Rates
Your real estate photography pricing shouldn’t be pulled out of thin air. Here are a few key factors that typically shape what you can (and should) charge:
- Property Size and Complexity. Larger homes, or those with quirky layouts or standout features, take more time to shoot and edit. That bumps up your workload (and your rate).
- Your Experience Level: Seasoned photographers can charge more, not just because of their skill but because they’re faster, more efficient, and deliver reliably sharp results.
- Add-On Services: Drone shots, video walkthroughs, twilight sessions, AI-enhanced edits… these extras add value and justify higher pricing.
Getting a feel for what influences rates in your local market (and what clients actually value) helps you stay competitive without undercutting your worth.
Quick Fact: Real estate photography demand tends to spike in spring and summer. Seasonal market shifts can drive a 10–15% swing in demand, which often translates to income fluctuation.
What About Working With a Team?
Freelancing isn’t the only way to grow in real estate photography. Many photographers collaborate with studios or agencies that regularly assign shoots. It’s a solid path if you want more consistency and less solo juggling.
Perks of Being Part of a Team
Working under an agency or studio umbrella comes with clear benefits:
- Reliable workflow: No more dry spells between clients; teams often have an ongoing stream of projects lined up.
- Fewer admin duties: You can focus on shooting and editing while someone else handles scheduling, payments, and client back-and-forth.
- Room to grow: Collaborating with editors, marketers, and other creatives sharpens your skills faster and exposes you to different styles and workflows.
These setups aren’t just for newcomers either. Even experienced photographers join teams to scale up without taking on more overhead.
Some agencies, like Estate Skyline, bridge the gap between real estate pros and trusted creatives, making it easier to land consistent, quality work.
Legal and Business Considerations for Real Estate Photographers
Running a real estate photography business requires more than creative skills, it demands a solid grasp of legal and operational responsibilities.
Taking the time to address these foundational aspects protects your work, builds client trust, and sets you up for long-term success.
✅ Licensing and Certifications
Before booking your first shoot, make sure your business is set up legally.
That might mean registering a business name, getting a local business license, or forming an LLC or sole proprietorship. The requirements vary by state, so check your local rules.
If drone photography is part of your services, there’s one certification you must have: the FAA Part 107 Remote Pilot Certificate. It’s legally required for commercial drone use in the U.S. (real estate included), and proves you understand airspace regulations and safety protocols.
This isn’t just red tape. Having the Part 107 license is often seen as a sign of professionalism, and some clients won’t hire drone photographers without it.
📄 Contracts
Every shoot should be backed by a written contract or service agreement.
This document should clearly define the scope of work, the number of delivered images, turnaround time, payment terms, cancellation policies, and (most importantly) usage rights.
Real estate agents typically receive a license to use your images for marketing a specific listing, but you retain the copyright.
Clarifying this protects your creative ownership and prevents unauthorized use across multiple listings or platforms.
🛡️ Insurance
Protecting your photography equipment, business, and yourself is essential.
General liability insurance safeguards you in case of accidents while on a property, such as someone tripping over your gear.
Equipment insurance covers theft, damage, or loss of your valuable cameras and drones.
If you’re flying drones commercially, drone liability insurance is also highly recommended; it can protect you in the event of crashes, property damage, or personal injury.
Even if not required by law, many high-end clients and brokerages will expect proof of insurance before working with you.
🧾 Legal & Business Setup Checklist
Here’s a step-by-step checklist to help you build a legally sound and professional real estate photography business:
- ✅ Choose a business structure (LLC, Sole Proprietor, etc.)
- ✅ Register your business name with your state
- ✅ Apply for any required local business licenses or permits
- ✅ Get an EIN (Employer Identification Number) for tax purposes
- ✅ Open a separate business bank account
- ✅ Draft client contracts or service agreements
- ✅ Obtain general liability and equipment insurance
- ✅ Get FAA Part 107 Certification (for drone work)
- ✅ Create a pricing guide and clearly define your services
- ✅ Set up a bookkeeping or accounting system (QuickBooks, Wave, or an accountant)
- ✅ Prepare and file taxes quarterly or annually, depending on your setup
By laying the proper legal and business groundwork, you not only protect yourself and your work – you also present yourself as a credible, trustworthy professional.
Taking these steps early on builds confidence with clients, streamlines your operations, and allows you to focus on what you do best: creating stunning visuals that sell homes.
Wrapping It All Up
As you can see, you don’t need a degree or decades of experience to break into real estate photography. You just need the right mix of skill, consistency, and smart positioning.
The industry isn’t waiting for you to be “ready.” The sooner you start putting yourself out there (portfolio in hand, pricing dialed in, and camera at the ready), the sooner you’ll start landing real clients.
Real estate moves fast. And if you’ve got the eye and the drive, there’s plenty of room for you.
Want to connect with serious opportunities faster? Estate Skyline links real estate photographers with the agents and brokerages who need them most.
Let’s talk, and get your next gig on the books.


- What Is Real Estate Photography?
- Real Ways to Learn Real Estate Photography (No Degree Required)
- 6 Key Skills and Knowledge to Become a Real Estate Photographer
- Necessary Equipment for Real Estate Photography
- How to Build Your Real Estate Photography Portfolio
- Setting Pricing and Services
- What About Working With a Team?
- Legal and Business Considerations for Real Estate Photographers
- Wrapping It All Up